This post is to give anyone starting out with HammerDB a guide on using the CLI or command line interface for text based environments. As the workflow in the CLI and GUI are the same we will show equivalent commands side by side to help you quickly get up to speed on using the CLI in both interactive and scripted scenarios.
Help and Navigation
To begin with run the hammerdbcli command in Linux or hammerdbcli.bat in Windows and type help at the hammerdb prompt.
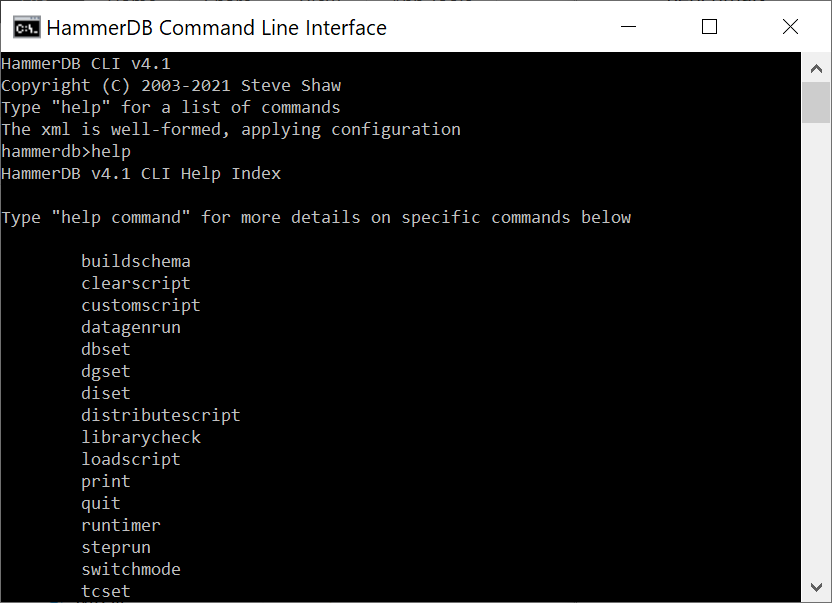
This displays the available CLI commands with “help command” providing detailed information about the command and arguments required.
To navigate and edit at the CLI use the standard Ctrl commands as follows:
| Ctrl Command | Action |
| Ctrl-P | Move to previous command |
| Ctrl-N | Move to next command |
| Ctrl-F | Move cursor forward |
| Ctrl-B | Move cursor backward |
| Ctrl-A | Move cursor to the start |
| Ctrl-E | Move cursor to the end |
| Ctrl-G | Clear Line |
| Ctrl-K | Cut |
| Ctrl-Y | Paste |
| Ctrl-H | Backspace |
Librarycheck
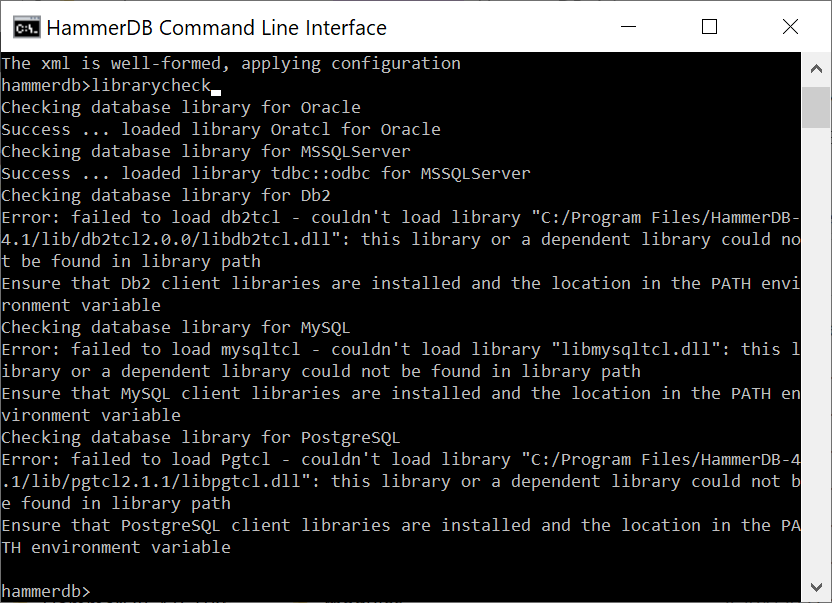
One of the first things you will want to do is make sure that we can access the 3rd party driver libraries for the database that we want to use. This is done with the librarycheck command. In this example we are using SQL Server so the message shows that everything is in order and we can proceed with running tests. If the library failed to load consult the HammerDB documentation on installing and configuring your libraries with the PATH environment variable for Windows or LIBRARY_PATH environment for Linux.
Selecting a database
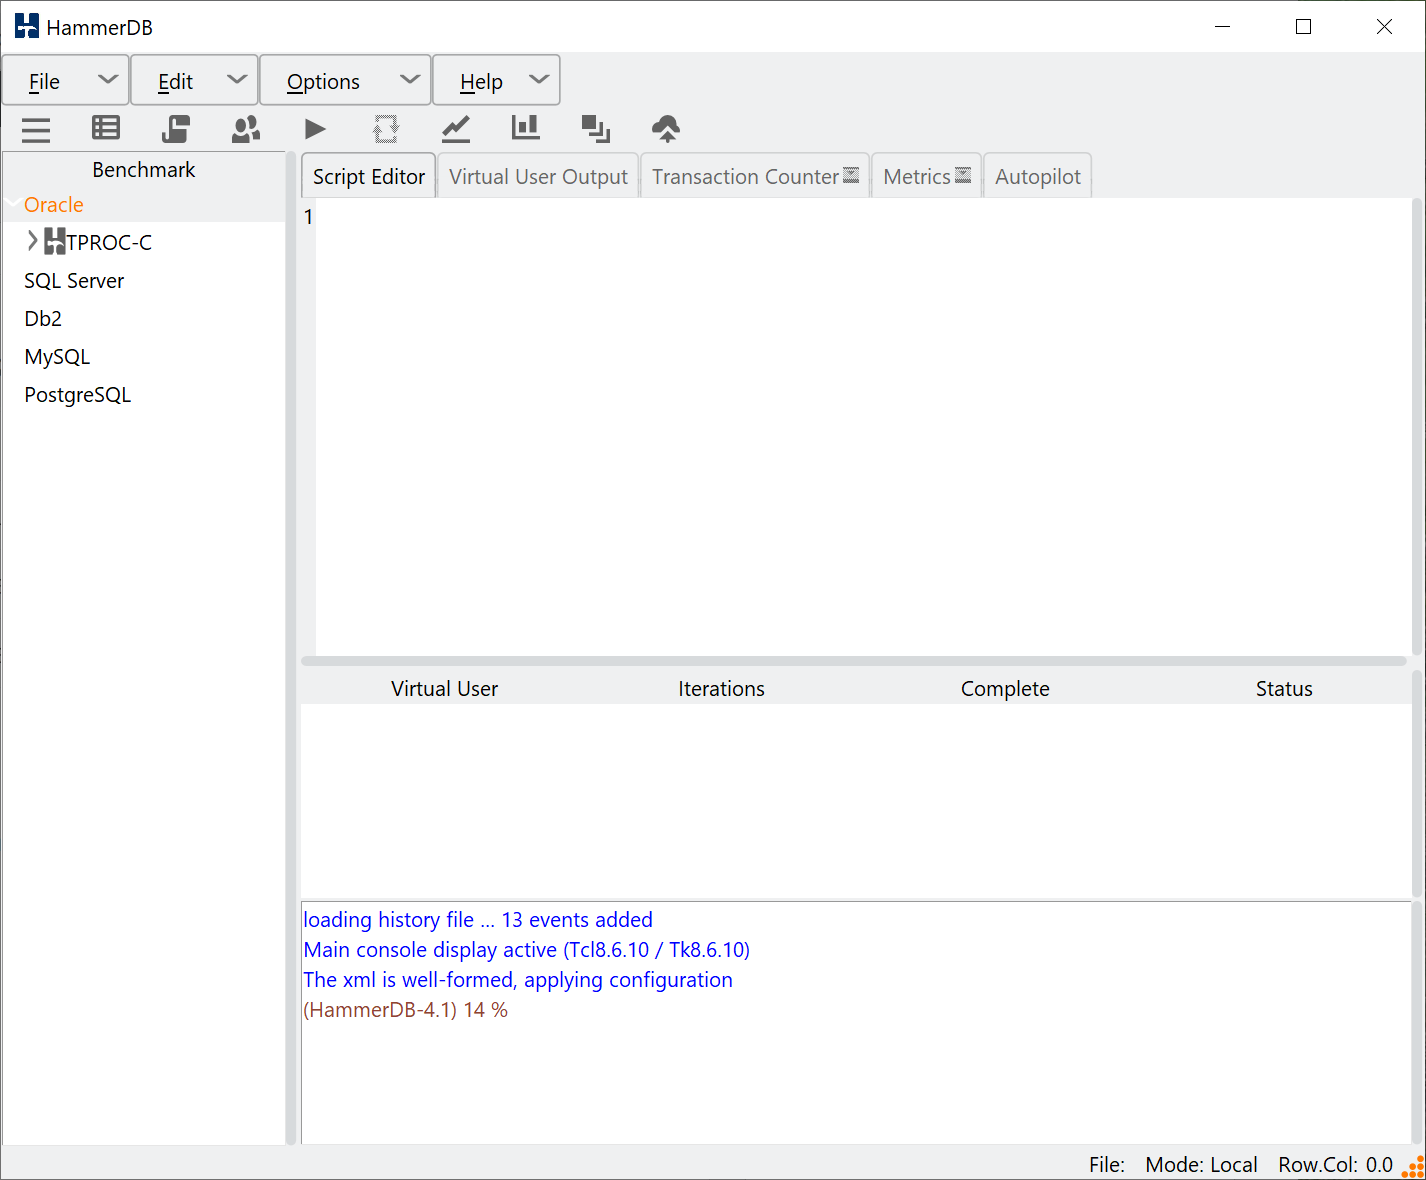
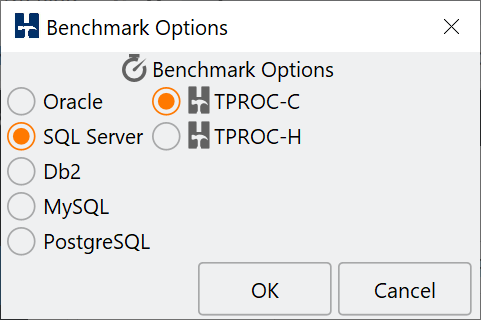
The next thing you will want to do is to select your preferred database. In the GUI we can select from the menu or double right-click the database heading.
This will show the benchmark options dialog.
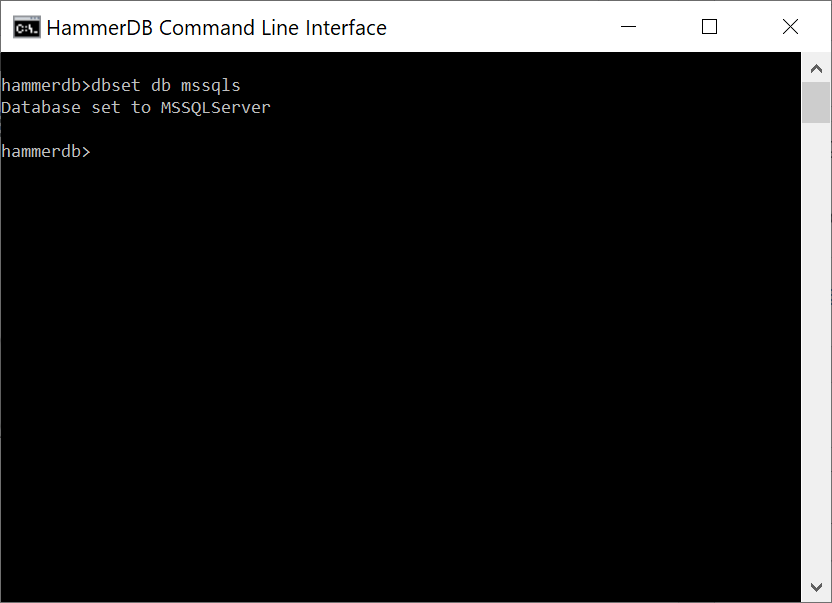
In the CLI this corresponds to the dbset command with the database set using the db argument according to the prefix in the XML configuration which are ora, mssqls, db2, mysql, pg for Oracle, Microsoft SQL Server, IBM Db2, MySQL and PostgreSQL respectively.
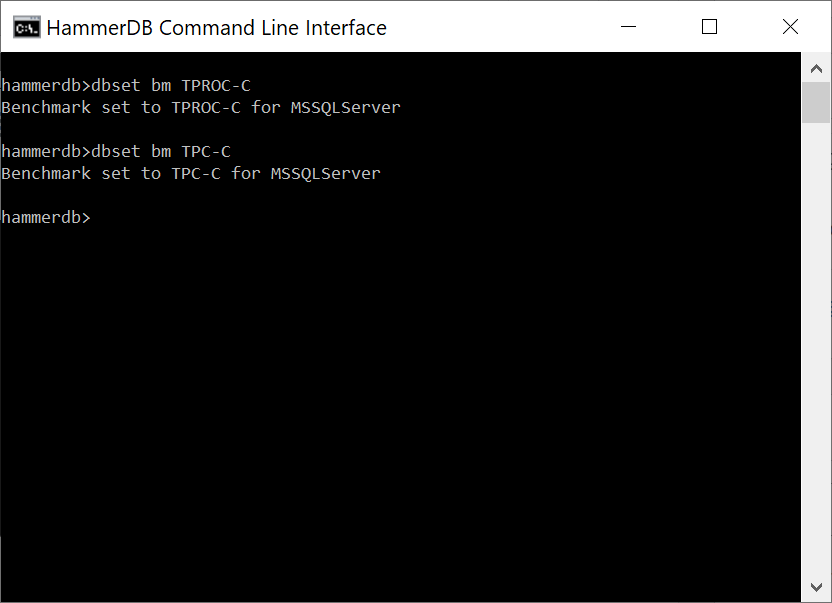
and benchmark set with the bm argument. You can use either the TPROC or TPC terminology at the CLI.
Building the Schema
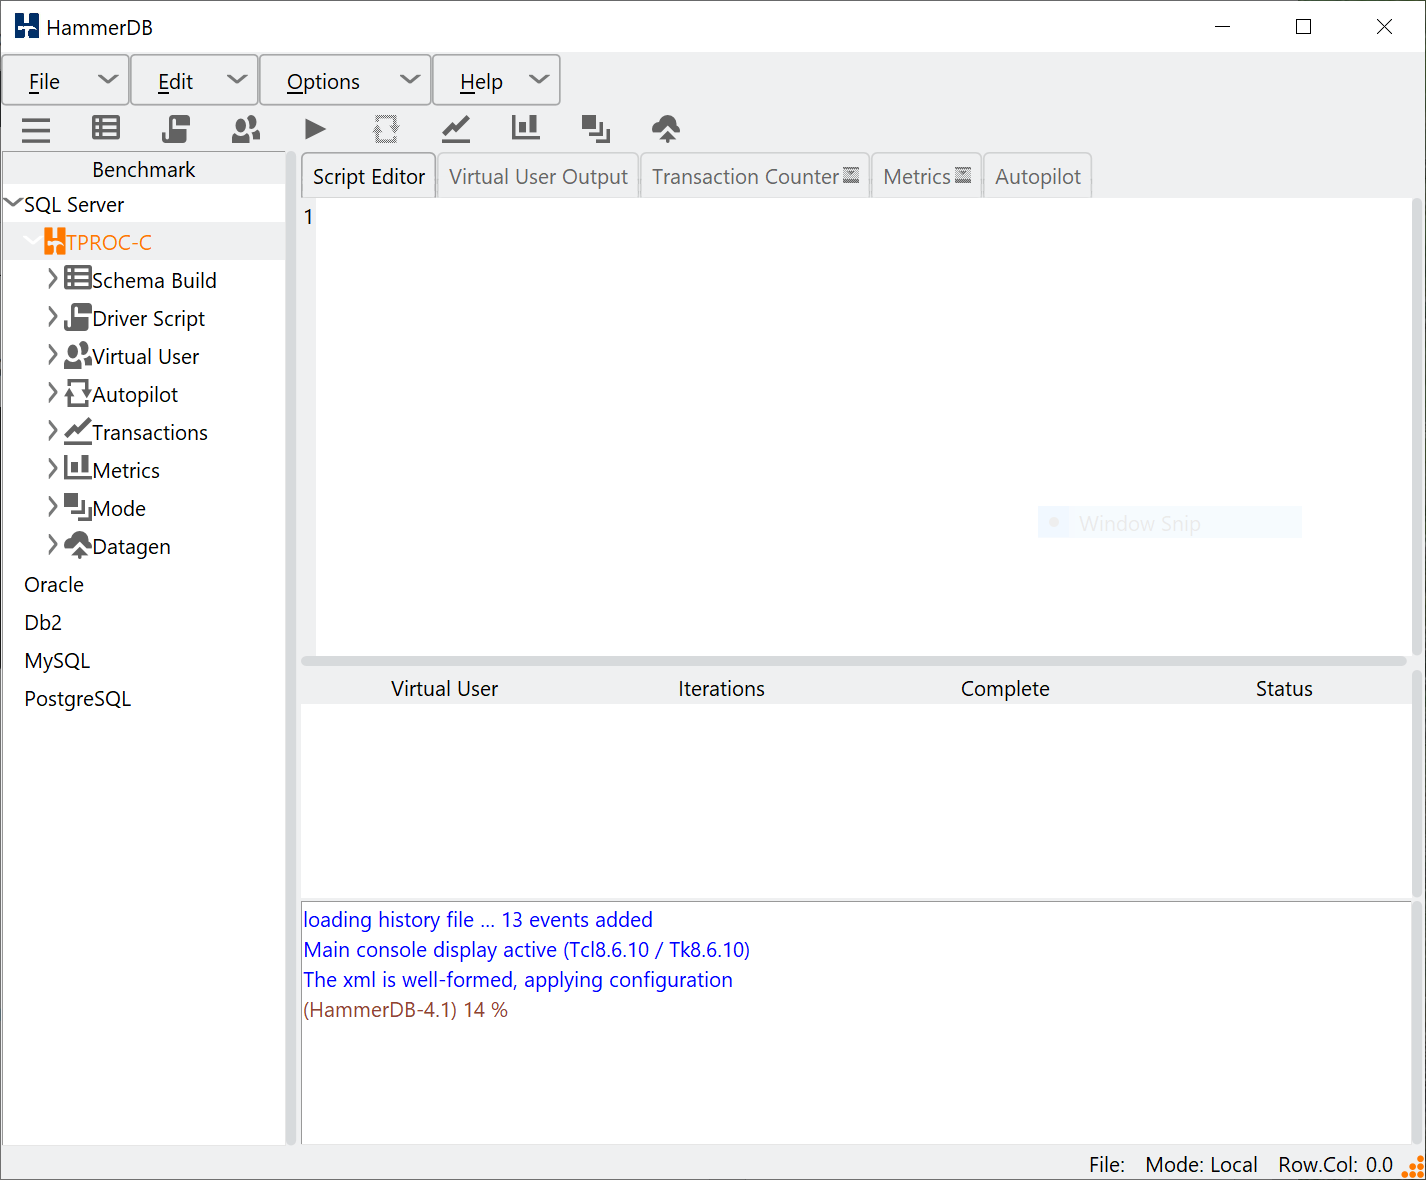
Expanding the GUI menu presents the workflow with our first task of building the schema.
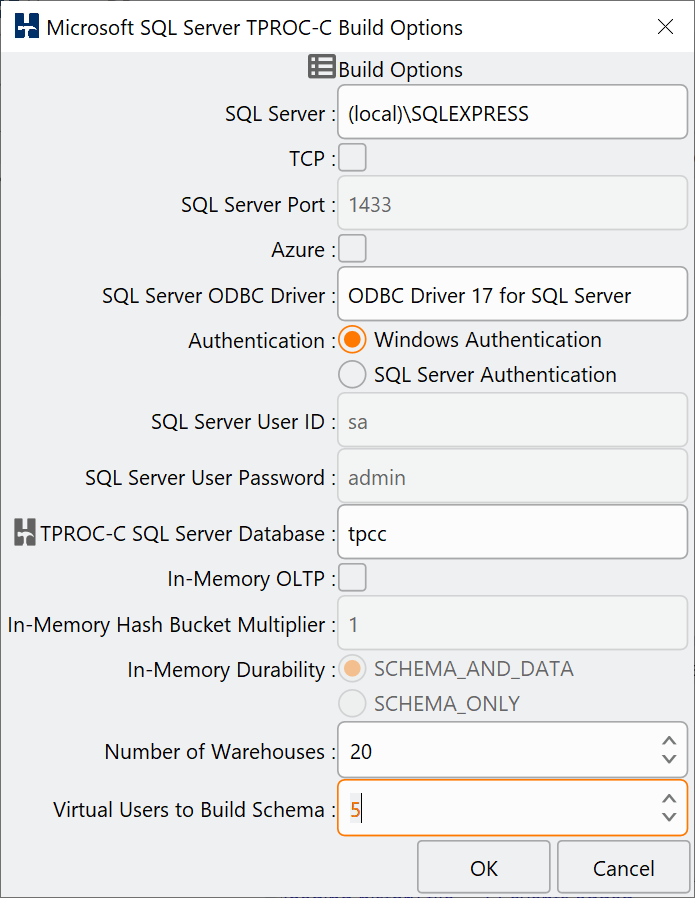
Selecting schema build and options presents the schema build options dialog. In the example below we have modified the SQL Server, number of warehouses to build and the virtual users to build them.
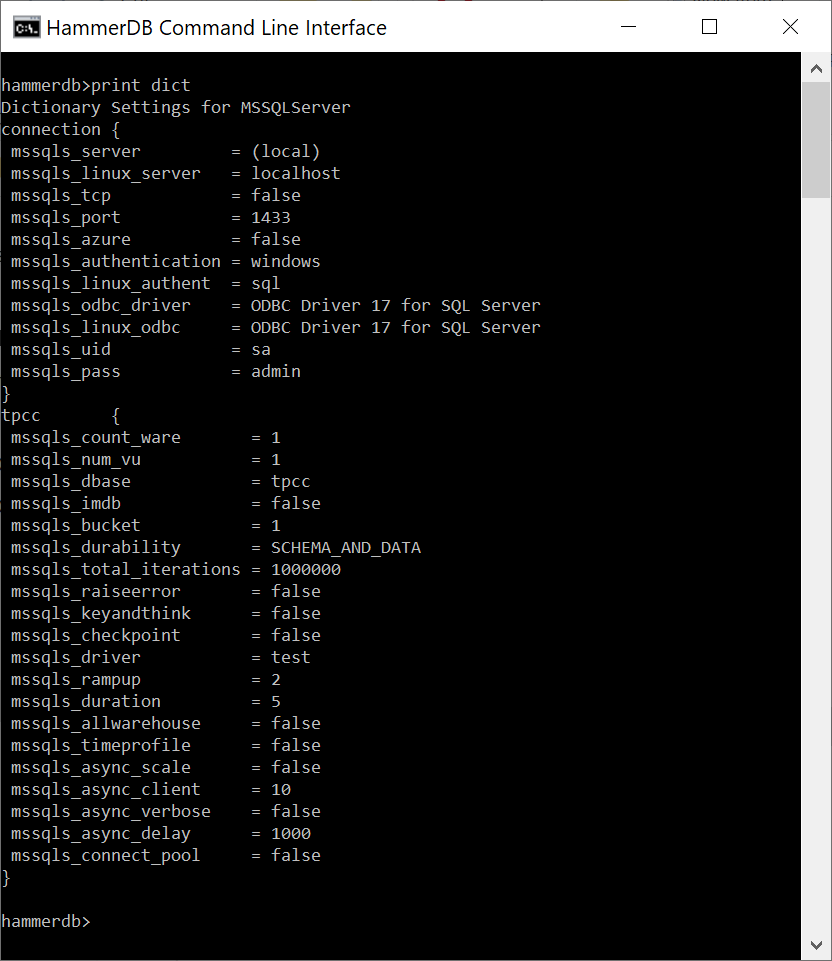
In the CLI the print dict command shows us the available options.
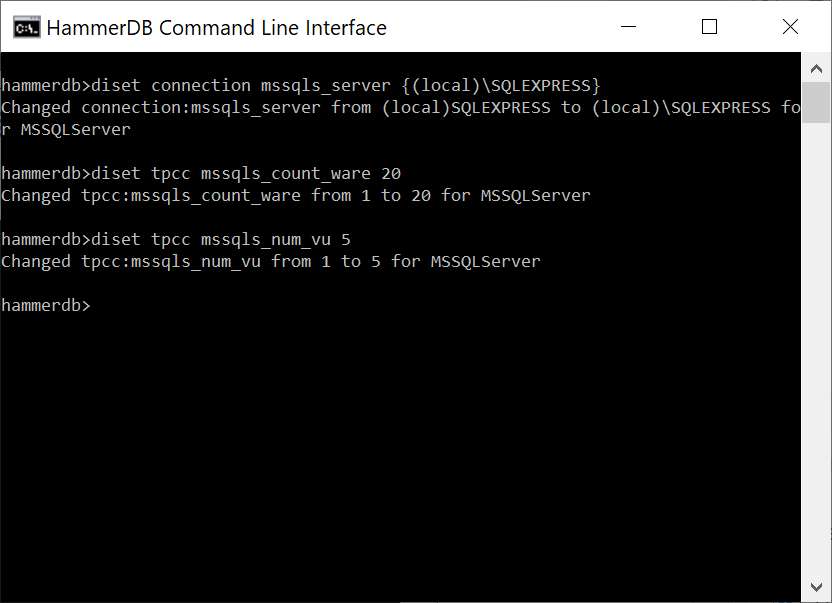
These can be modified with the diset command specifying the option and the value to be changed. The example below shows the same settings made in the GUI. We have set the connection value of mssqls_server and then the tpcc value of the warehouse count and the number of virtual users to build them. Note that for the mssqls_server value there is the backslash special character and therefore the entered value is wrapped with curly brackets {…} to preserve the special character.
In the GUI clicking on Build presents the build dialog. Clicking yes will start the schema build.
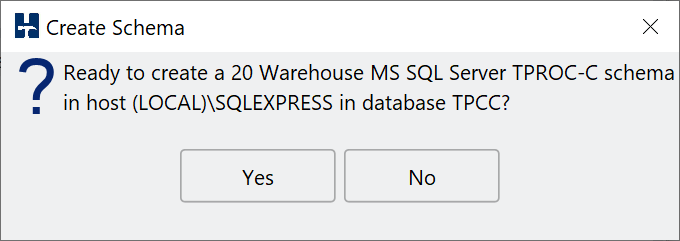
In the CLI buildschema shows the same prompt and accepts automatically.
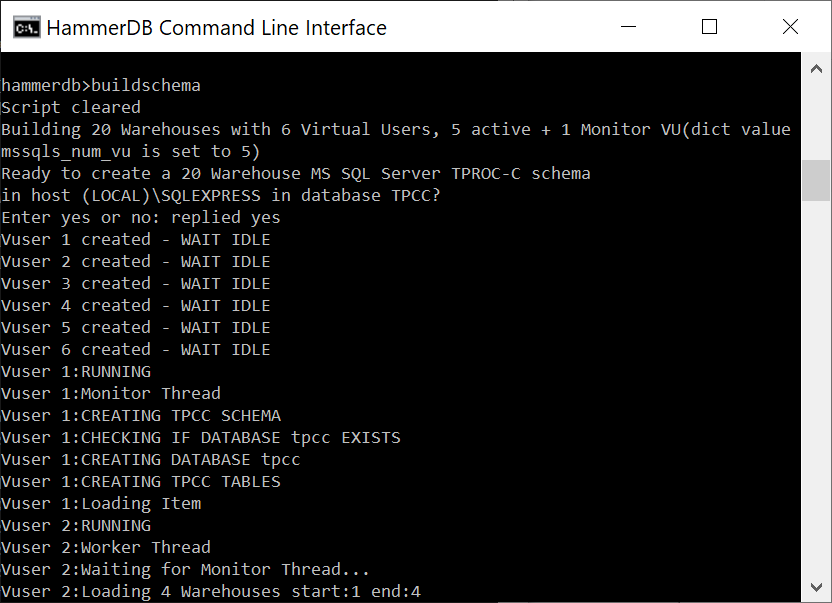
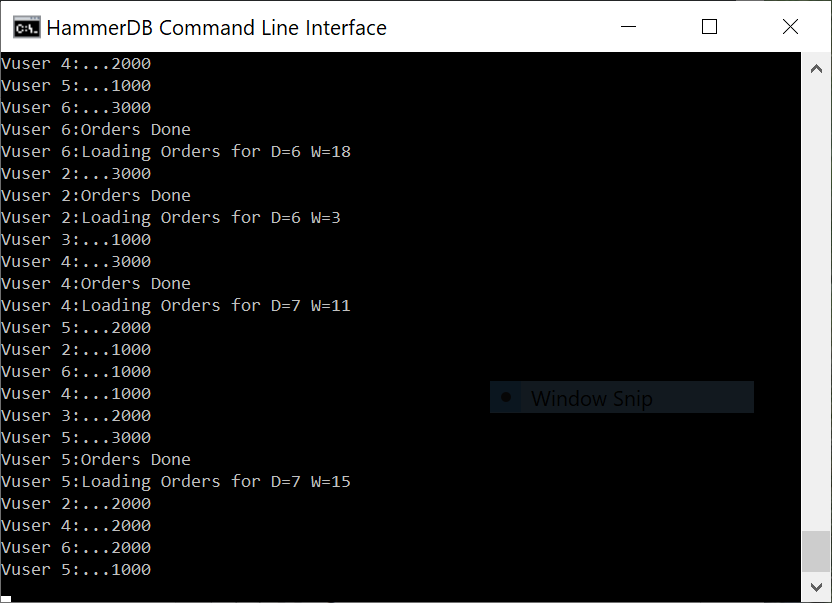
A key aspect is being able to visualise the multithreaded nature of the Virtual Users. In the GUI the Virtual User output is shown in a grid and status to a table easily enabling us to see the multithreaded nature of the workload. In the CLI all output is printed to the console preceded by the name of Virtual User producing it. Nevertheless the CLI is multithreaded in the same way as the GUI. For both the time it will take for the build to complete will depend on the HammerDB client CPU and the performance of the database server being loaded, during this time each action will be printed to the display. You may need a number of minutes for the build to complete.
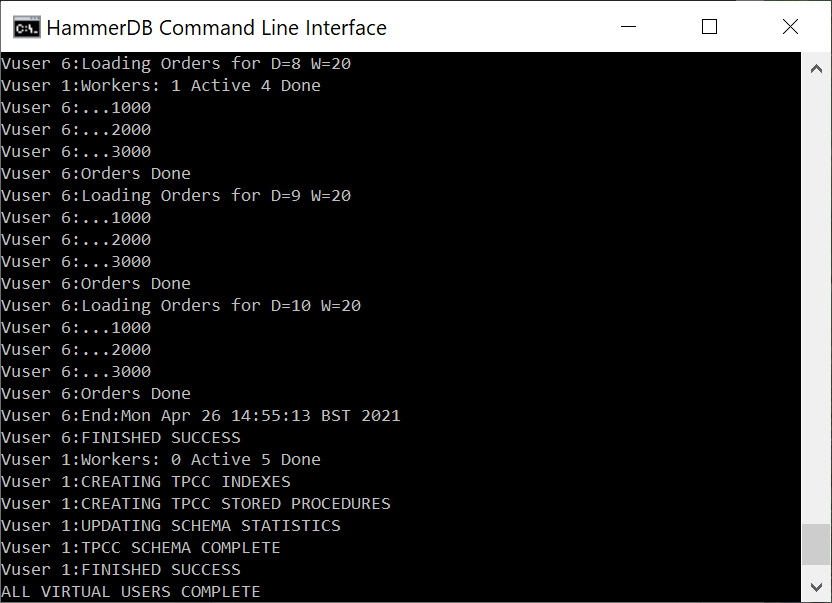
When the build is complete Virtual User 1 will show TPCC SCHEMA COMPLETE. The schema build is the same process whether built from the GUI or the CLI.
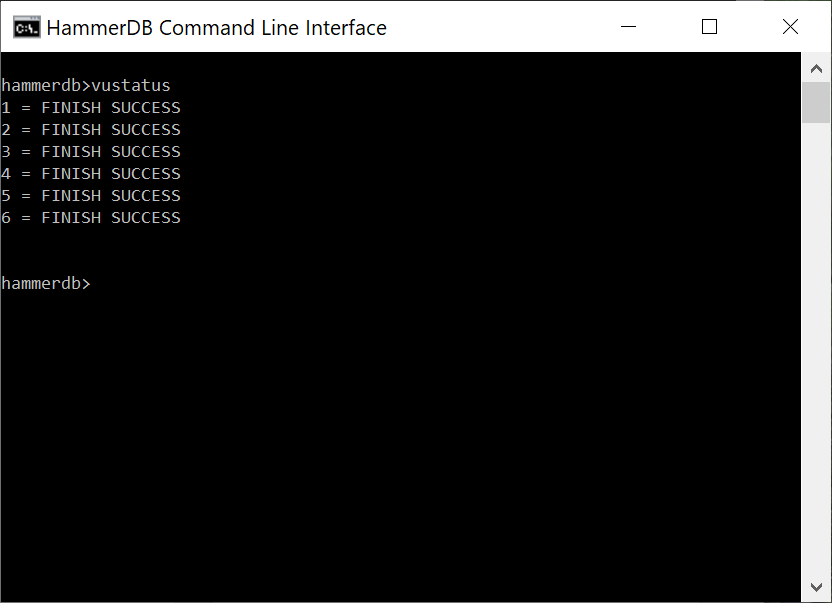
Using the vustatus command we can now see the status of the Virtual Users as having completed successfully. Note that as the CLI is running in interactive mode the vustatus command can be also be run while a workload is running. Press return for a prompt and then type the command needed. vudestroy will perform the equivalent action as pressing the stop button in the GUI to close the Virtual Users Down. Similarly doing the same while a workload is running will also do the same action as pressing the stop button while a workload is running in the GUI.
Loading the Driver and running the test
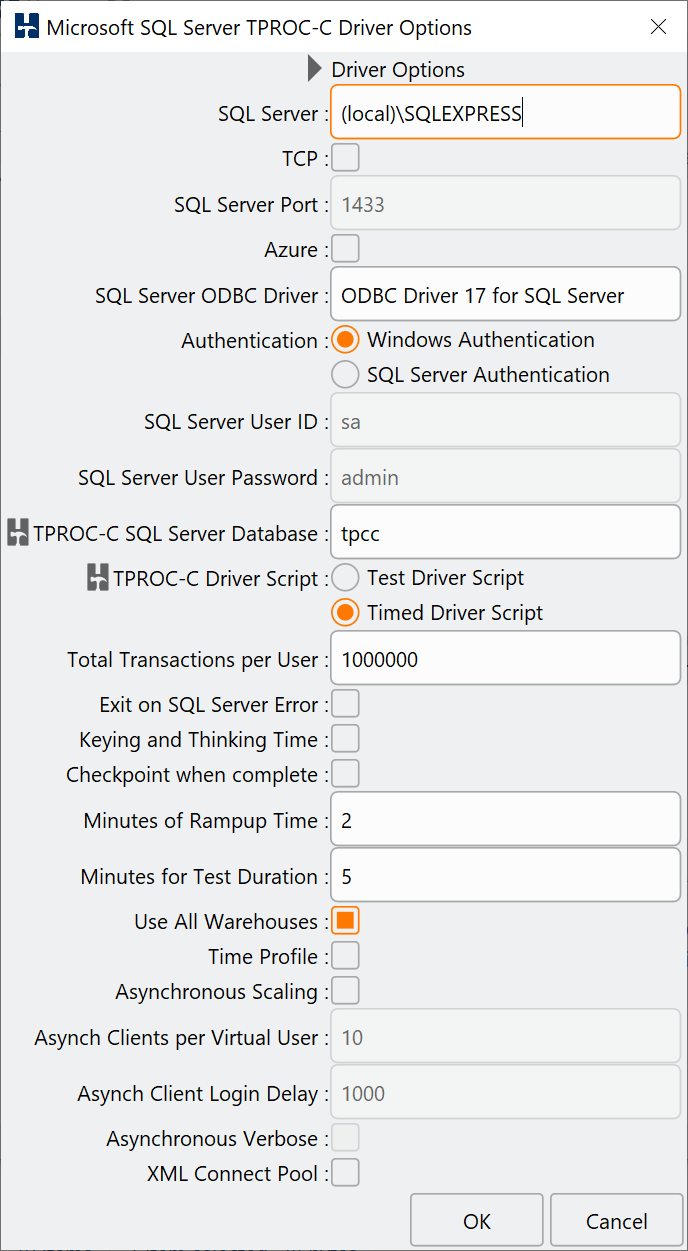
We have now built a schema. The next step in the workflow is to define the driver script options. In the GUI we are presented with an options dialog to set the configuration. In the example we have again set the server name, have chosen the timed workload and also selected the Use All Warehouses option.
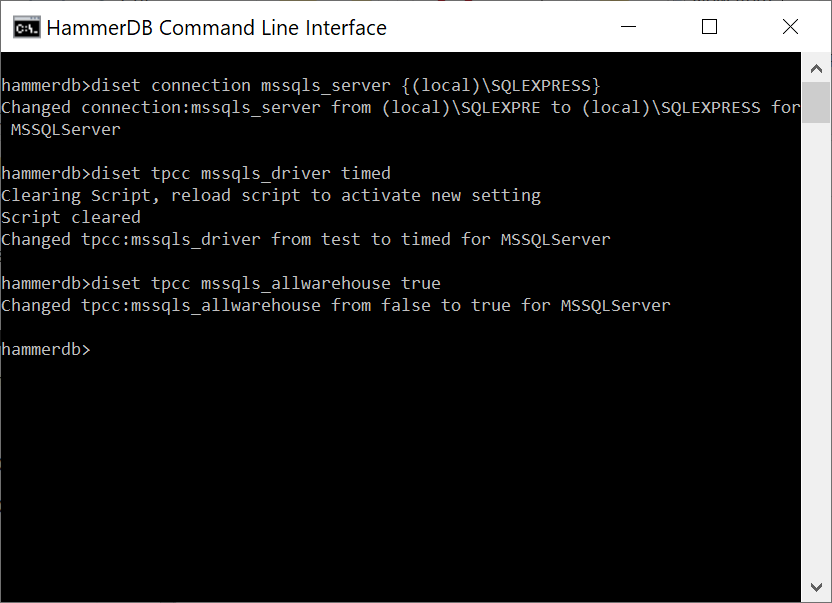
To do the same in the CLI we again use the diset command.
Once the options have been chosen the driver script is loaded automatically in the GUI or can be re-loaded with the Load command.
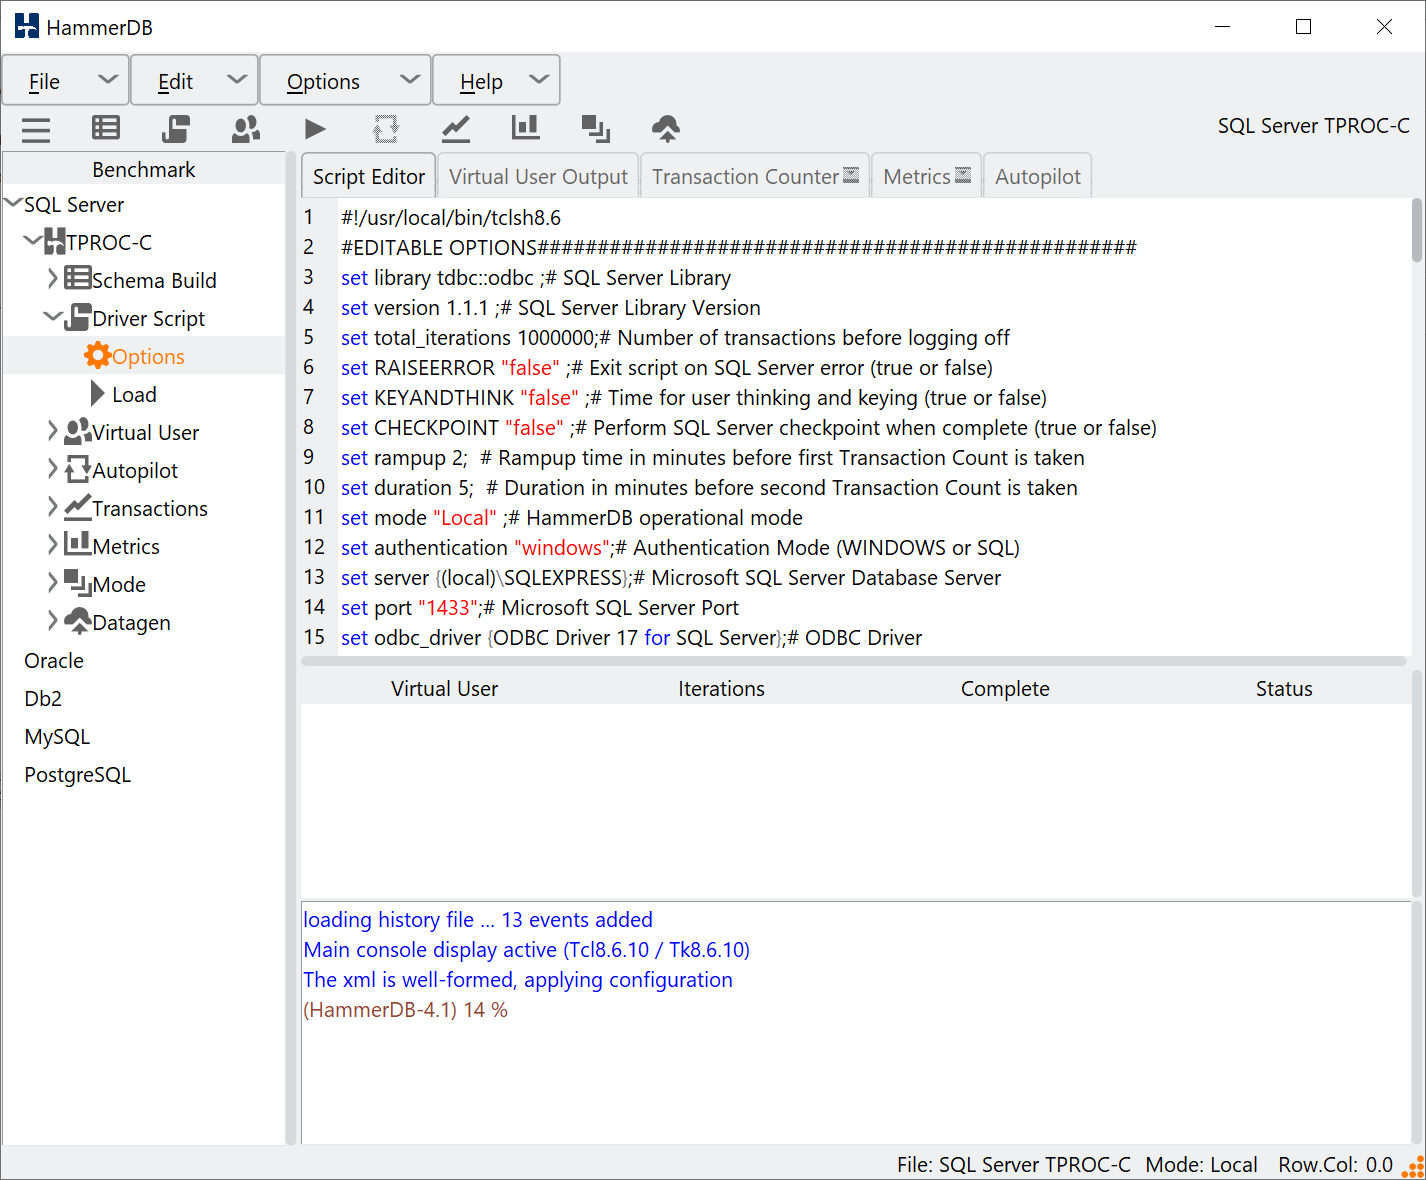
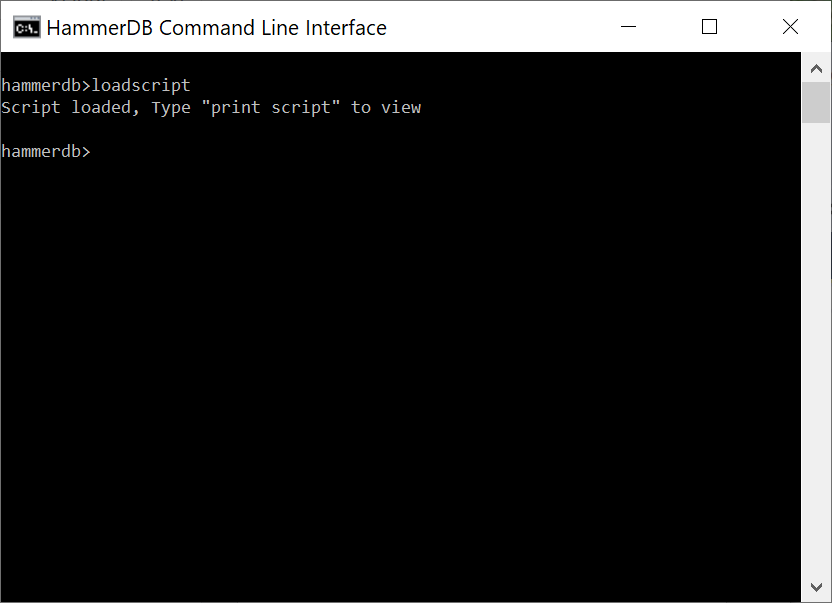
The loadscript command does the same at the CLI with the print script command showing the script loaded. Note that the driver script is identical in both the GUI and CLI (as long as you have chosen the same options) meaning that the workload that is run is also identical regardless of the interface chosen. You can also load a modified script using the customscript command meaning that you can edit a script in the HammerDB GUI save it and then load it to run in the CLI.
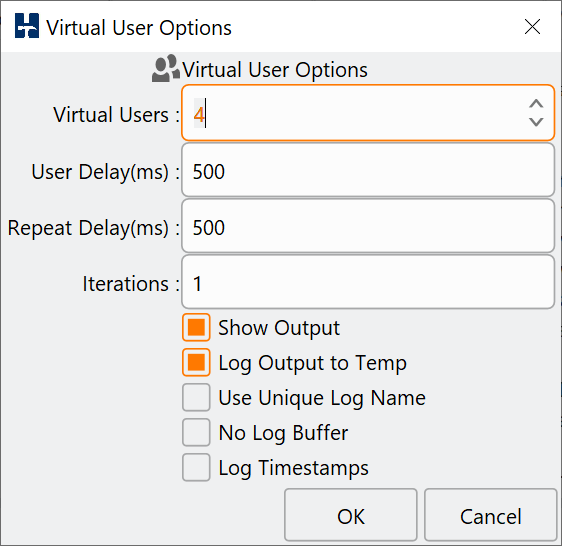
Referring back to the GUI for our workflow the next step is the creation of Virtual Users for running the driver script loaded.
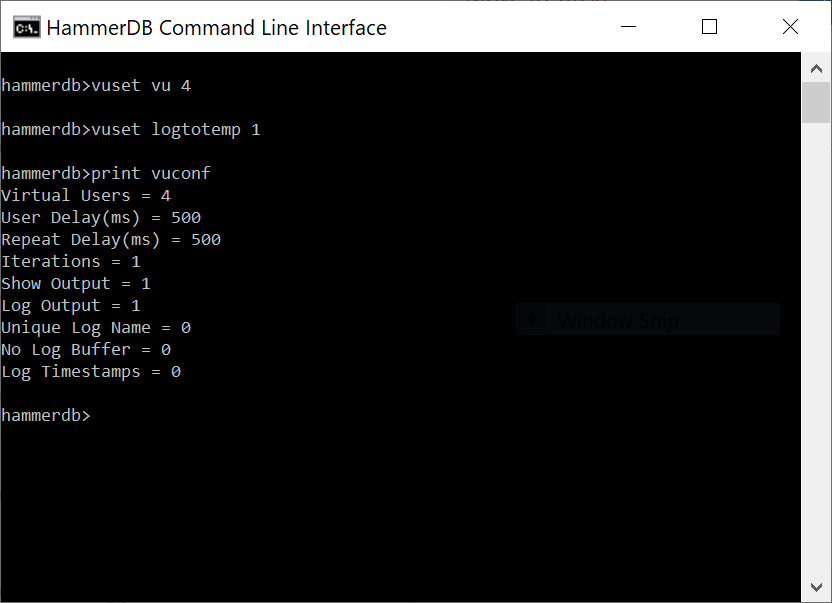
In the CLI the vuset command sets the Virtual User options and the print vuconf command displays the setting.
With the Virtual User configuration set the next stage is to create the Virtual Users. Having chosen the timed workload we see a monitor Virtual User in addition to the active Virtual Users chosen.
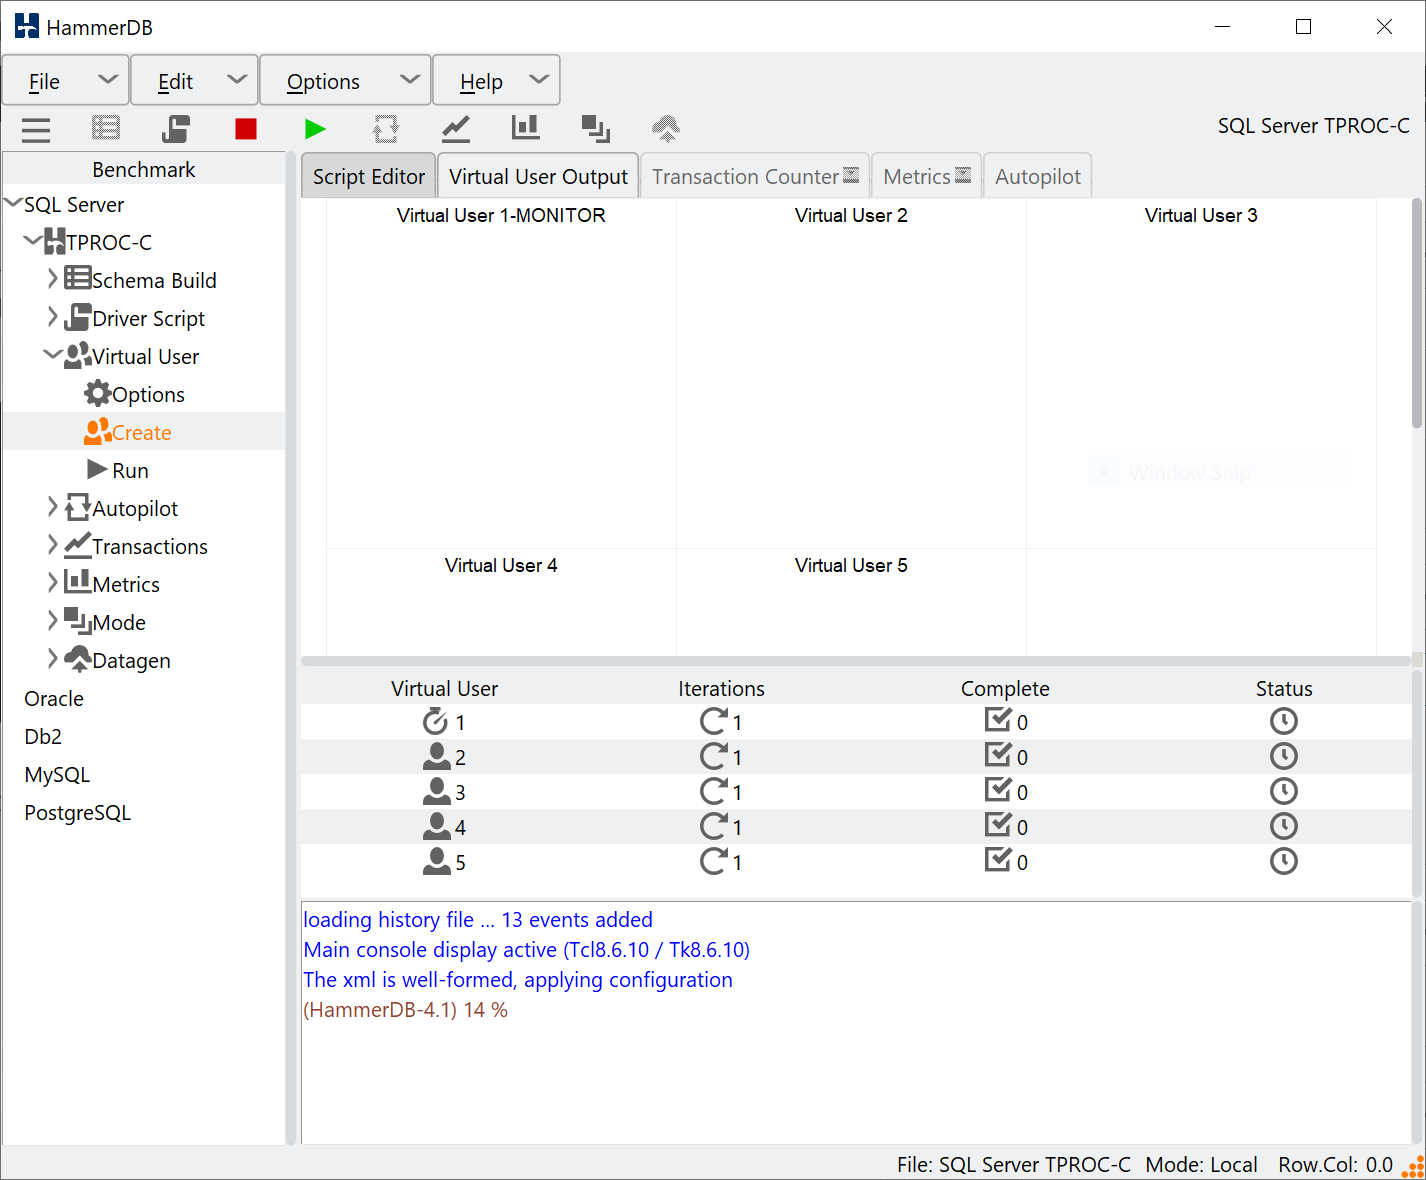
In the CLI the vucreate command creates the Virtual Users and the vustatus command shows the status that is shown in the status column of the Virtual User table in the GUI.
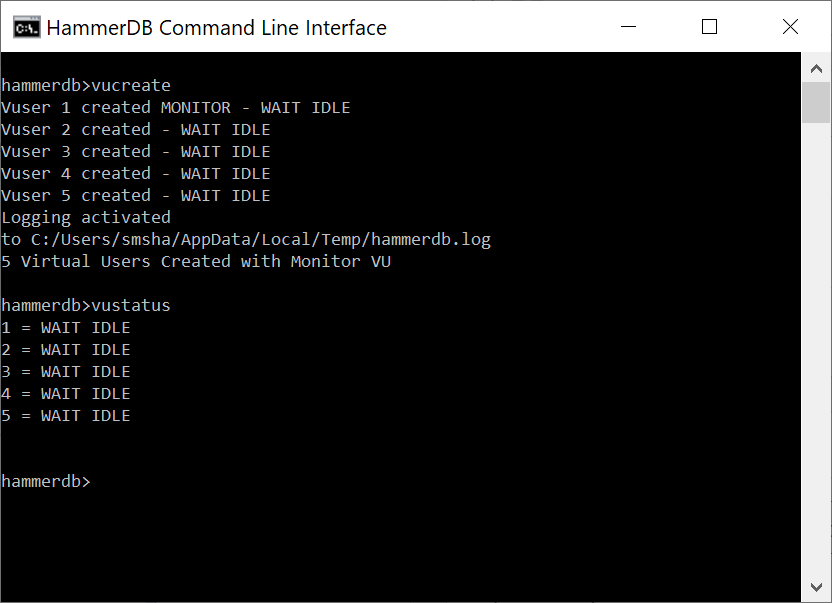
ln the GUI we would then run the Virtual Users, in the CLI the workload is started with with the vurun command.
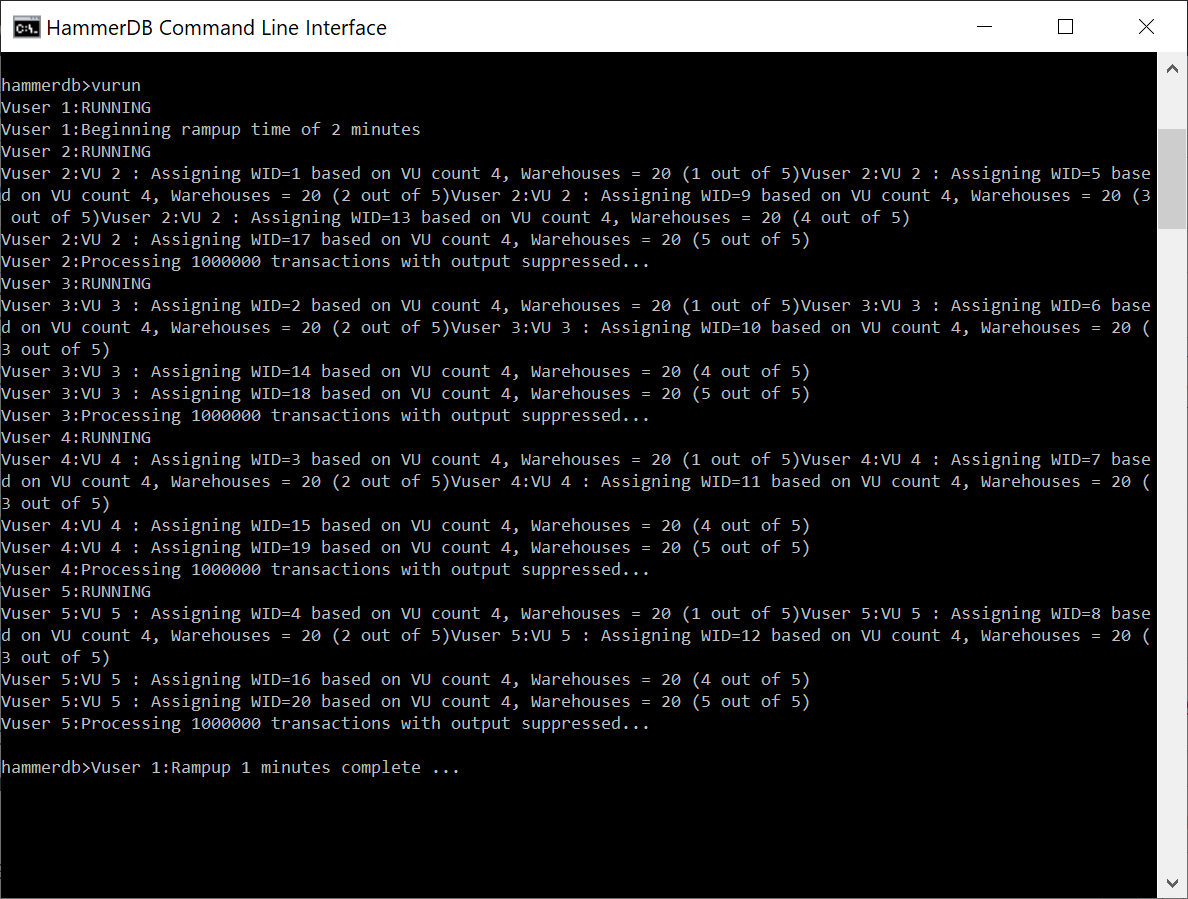
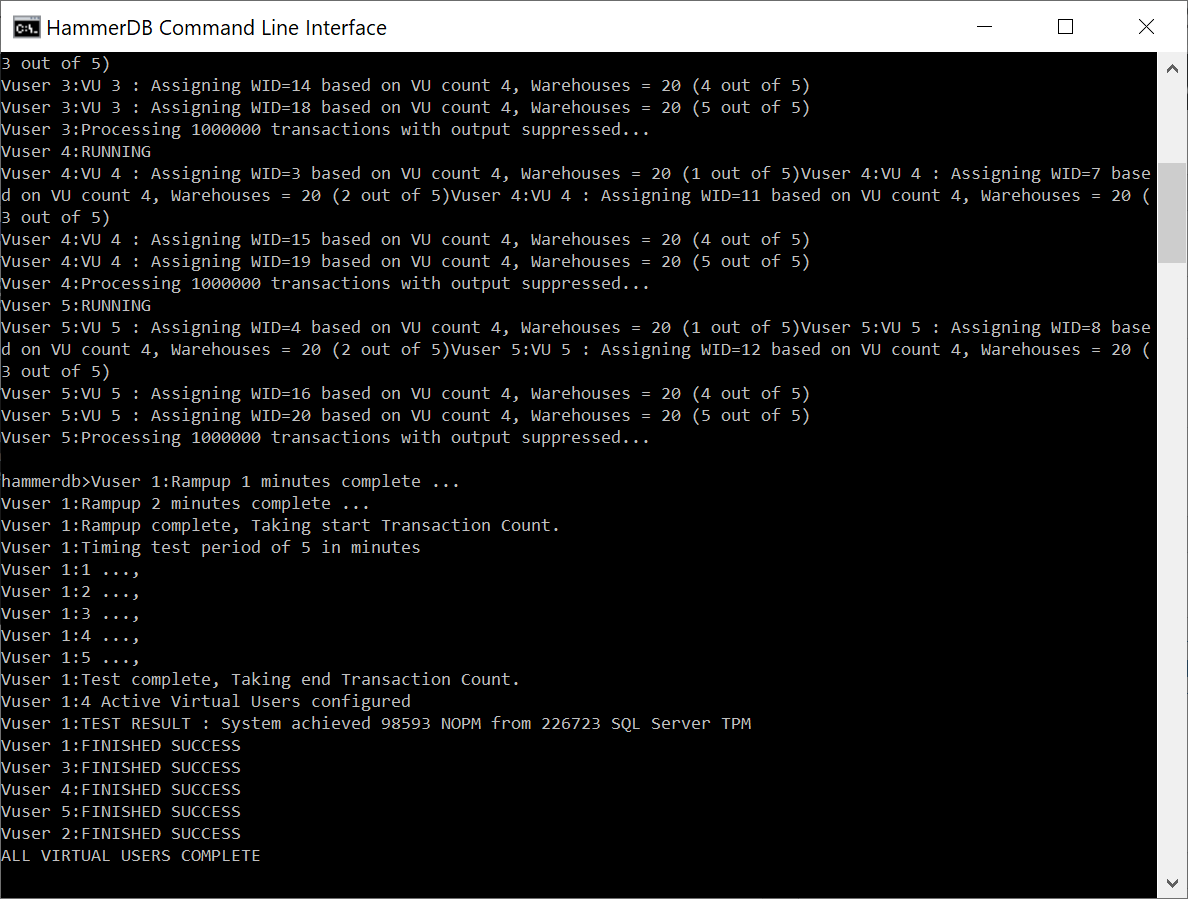
When the workload is complete we see the TEST RESULT output and the status of the Virtual Users. The vudestroy command will close down the Virtual Users in the same way as pressing the red stop button in the GUI.
Additional CLI Functionality
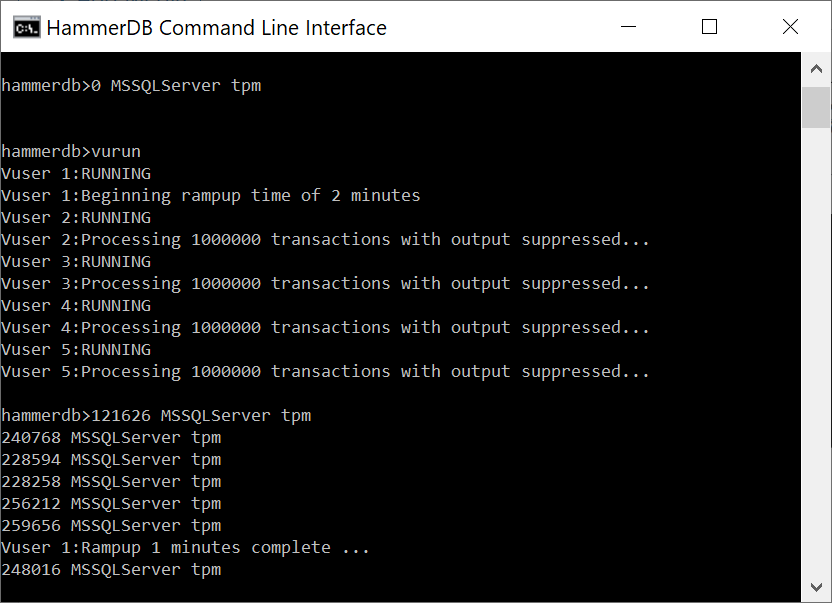
At this stage we have followed the GUI workflow to use the CLI to create the schema and run the TPROC-C workload with a number of Virtual Users. It is of note that much of the additional GUI functionality is also available with CLI commands, for example primary and replica instances can be created and connected in the CLI and also as shown the CLI transaction counter.
Scripting the workloads
We have seen how to run the HammerDB CLI interactively by typing commands in a similar manner that we would use the GUI to build schemas and run workloads. However one major benefit of the command line use is also the ability to script workloads. There are 2 approaches to scripting HammerDB CLI commands. Firstly we can run a script from the interactive prompt using the source command. Secondly we can use the auto argument to run a script directly without the interactive prompt.
To run a script using the source command we can take a text editor and enter the commands into a file with a .tcl extension. In this example we are running a timed workload with 2 active virtual users, we are logging the output and also running the transaction counter with logged output. Note one additional command has been added to what has been seen previously when running interactively, namely runtimer. This is where having run the same workload in the GUI helps understand the concepts. HammerDB ins multithreaded and the Virtual Users run independently as operating system threads. Consequently if vurun is followed by vudestroy in a script then the Virtual Users will be immediately terminated by the main thread as soon as they are started. This is unlikely to be the desired effect. Therefore runtimer keeps the main HammerDB thread busy and will not continue to the next command until one of 2 things happen. Firstly if the vucomplete command returns true or the seconds value is reached. For this reason the runtimer seconds value should exceed both the rampup and duration time. Then only when the Virtual Users have completed the workload will vudestroy be run.
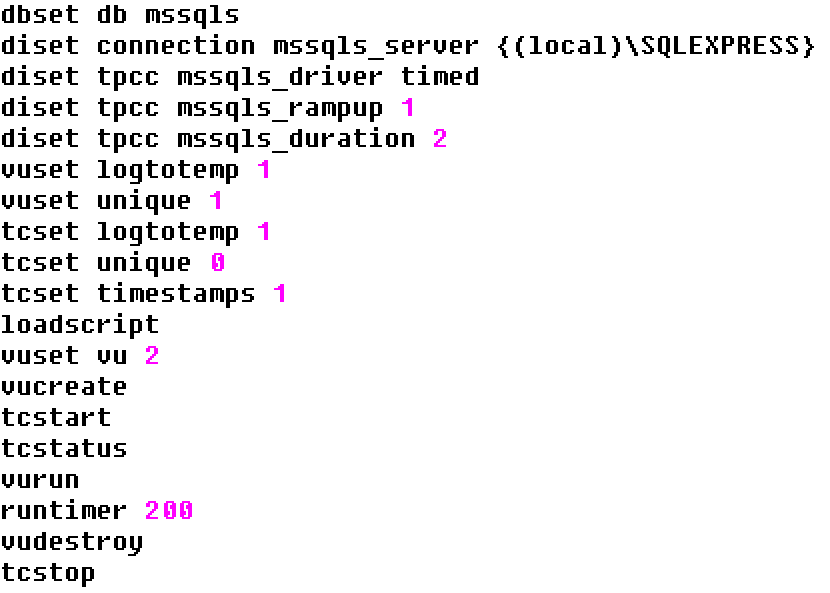
Now we can run the source command giving our script as an argument and the commands will be run without further interaction.
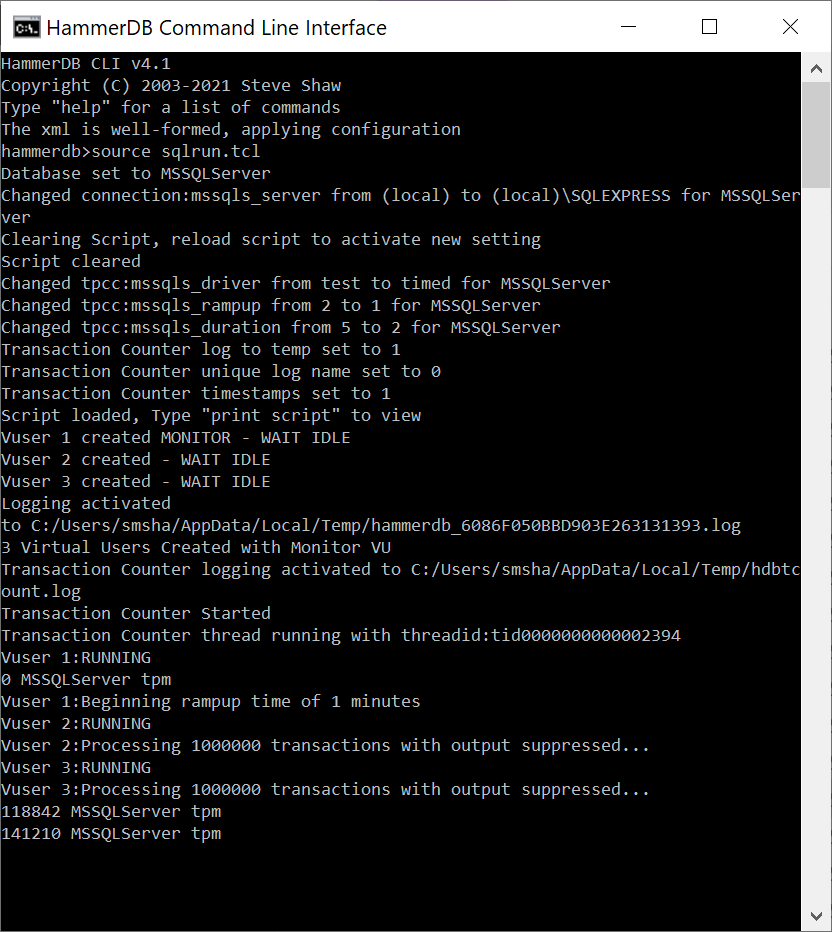
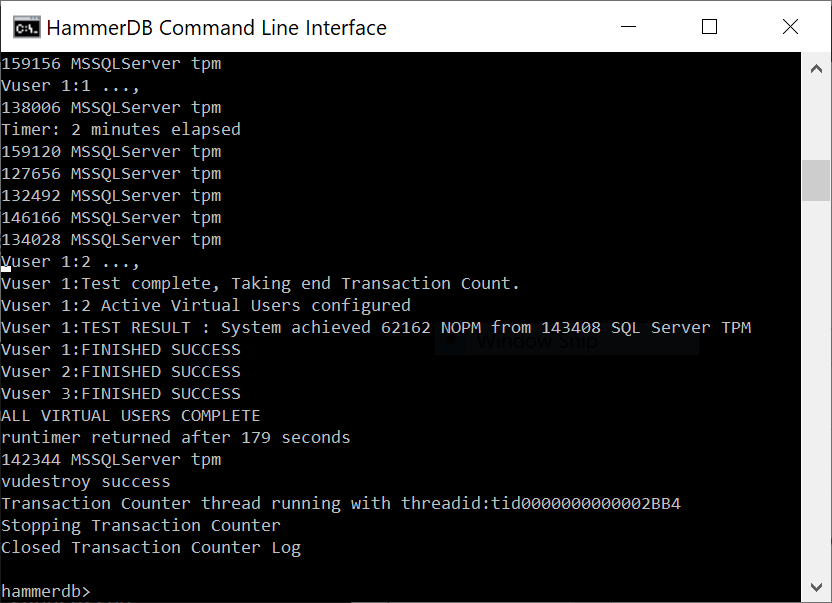
We can see how the script ran to completion, called vudestroy and returned us to the interactive prompt. If desired the quit command returns from the interactive prompt to the shell prompt.
The HammerDB CLI is not restricted only to the commands shown in the help menu. The CLI instead supports the full syntax of the TCL language meaning you can build more complex workloads.
There is an introductory tutorial to TCL here. We also recommend the following book as a comprehensive reference to TCL : TCL Programming Language by Ashok P. Nadkarni.
A simple example is shown using the foreach command to implement the autopilot feature from the GUI.
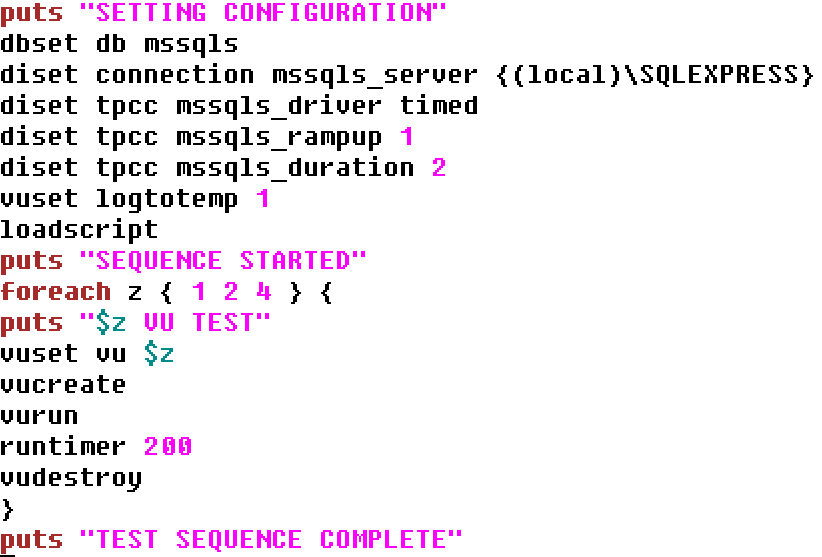
Running this script we are now executing a loop of tests with 1 then 2 then 4 Active Virtual Users in an unattended manner.
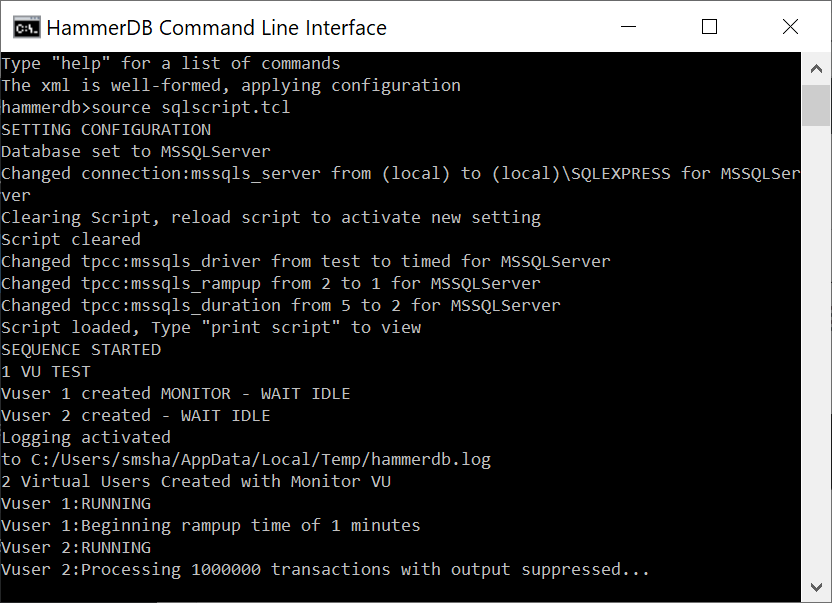
When the final iteration in the loop is complete the CLI returns to the prompt.
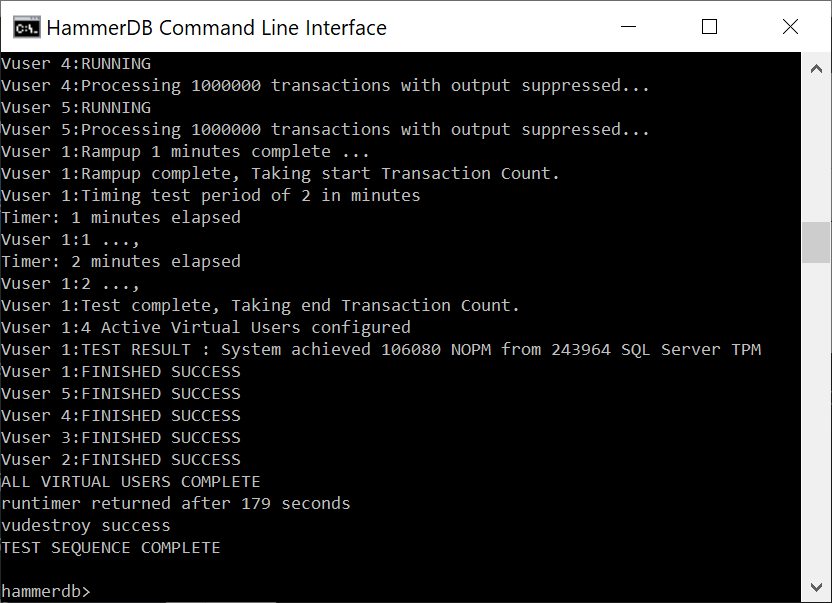
and the log file provides a summary of all of the workloads.
Vuser 1:1 Active Virtual Users configured
Vuser 1:TEST RESULT : System achieved 33643 NOPM from 77186 SQL Server TPM
...
Vuser 1:2 Active Virtual Users configured
Vuser 1:TEST RESULT : System achieved 66125 NOPM from 152214 SQL Server TPM
...
Vuser 1:4 Active Virtual Users configured
Vuser 1:TEST RESULT : System achieved 106080 NOPM from 243964 SQL Server TPM
...
Running the CLI from the OS Shell
Of course you can use TCL scripting to configure complex build and test scenarios including the execution of host commands. Another way is to run multiple CLI scripts from the OS shell such as Bash on Linux and Powershell on Windows. The following example shows a build and test script for SQL Server. Note the additional waittocomplete command in the build script. This command is a subset of runtimer and causes the CLI to wait indefinitely until all of the Virtual Users return a complete status. At this point the CLI will return. In this case it is followed by a quit command to exit the CLI. These scripts are called sqlbuild2.tcl and sqlrun2.tcl respectively.

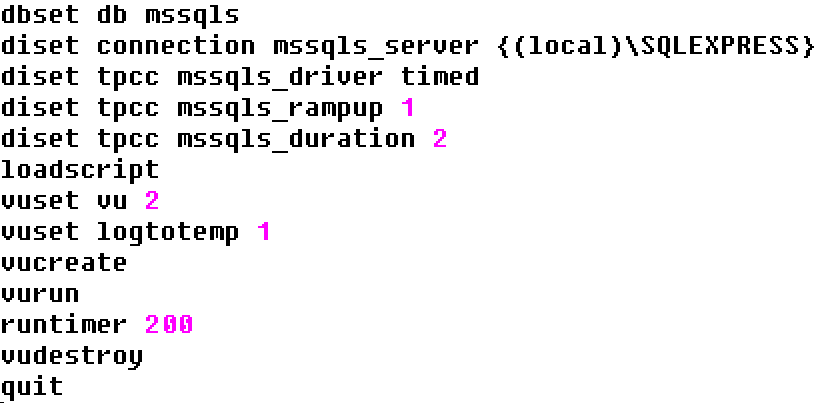
In Windows we can now write a powershell script called buildrun2.ps1 that calls the build and run scripts in turn. In Linux we would do the same with a bash script. In this case we use the auto argument to run the script in a non-interactive mode. These commands can be interspersed with other operating system or database commands at the shell level. In this case we have only written to the output however any additional database configuration commands can be used to build a complex test scenario.

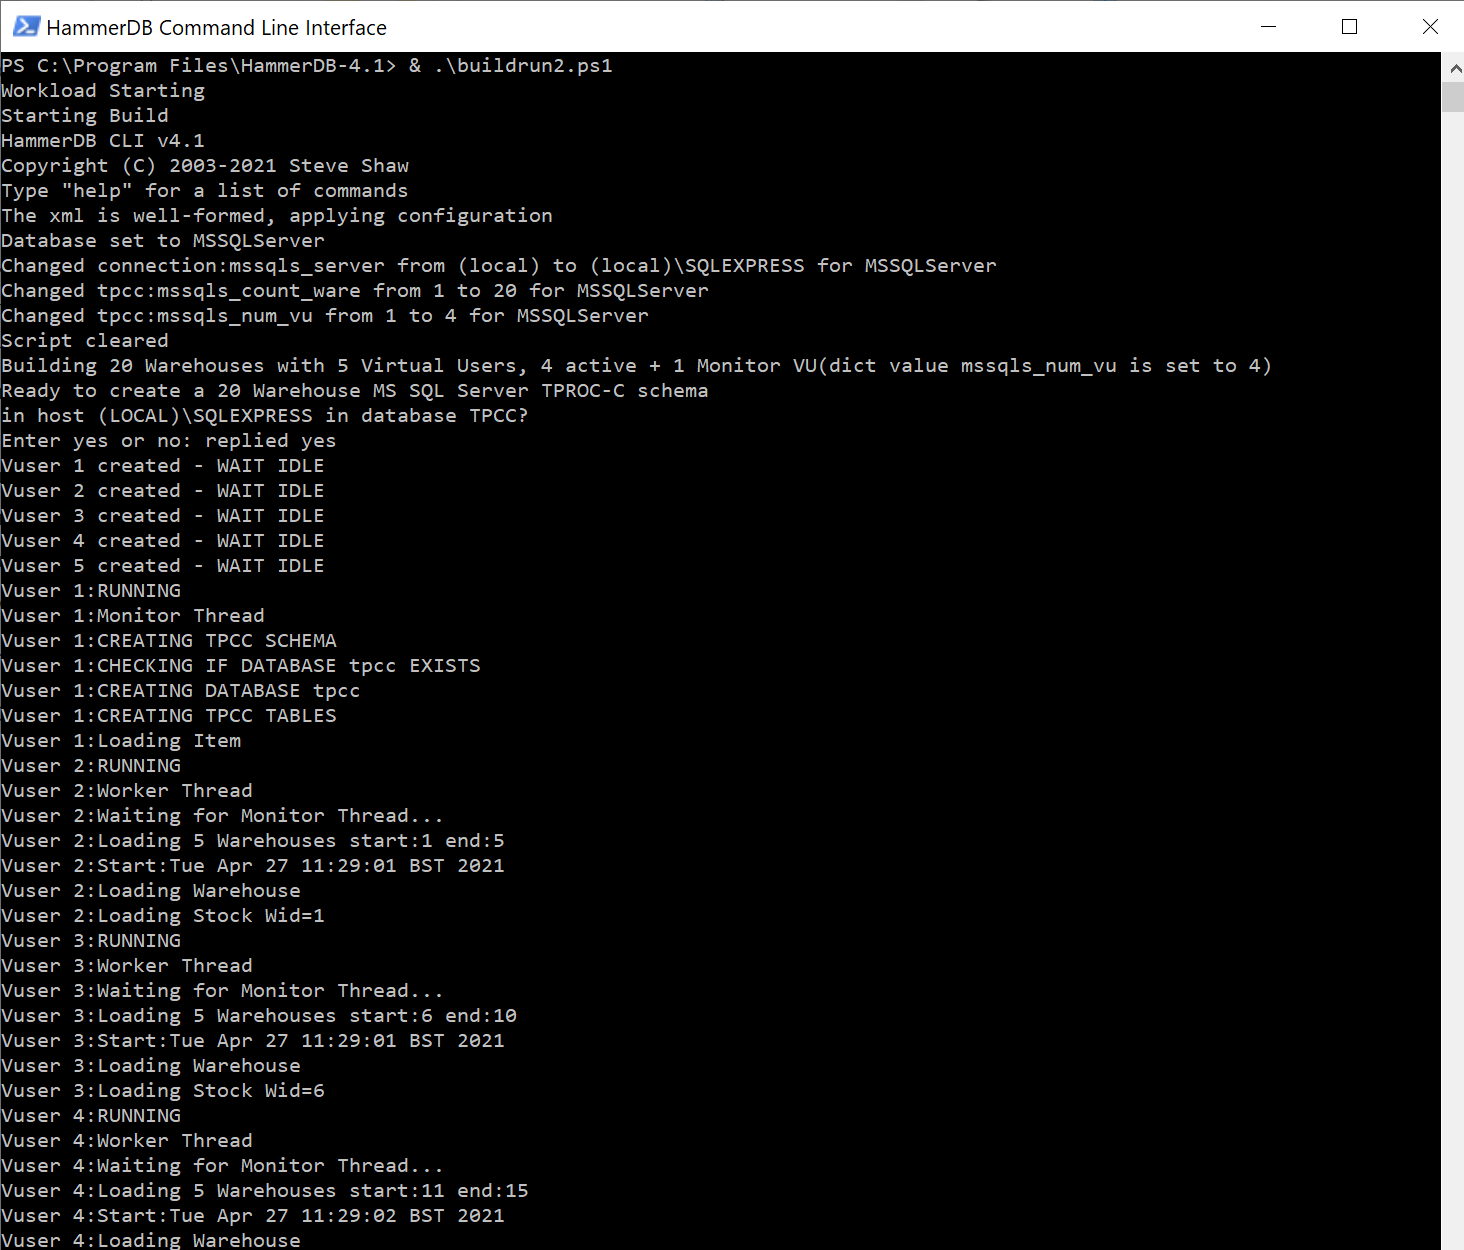
Starting the powershell we change to the HammerDB directory and run the powershell script. (You should always run the scripts after changing to the HammerDB directory rather than running them from another directory). This starts running the build script to build the schema.
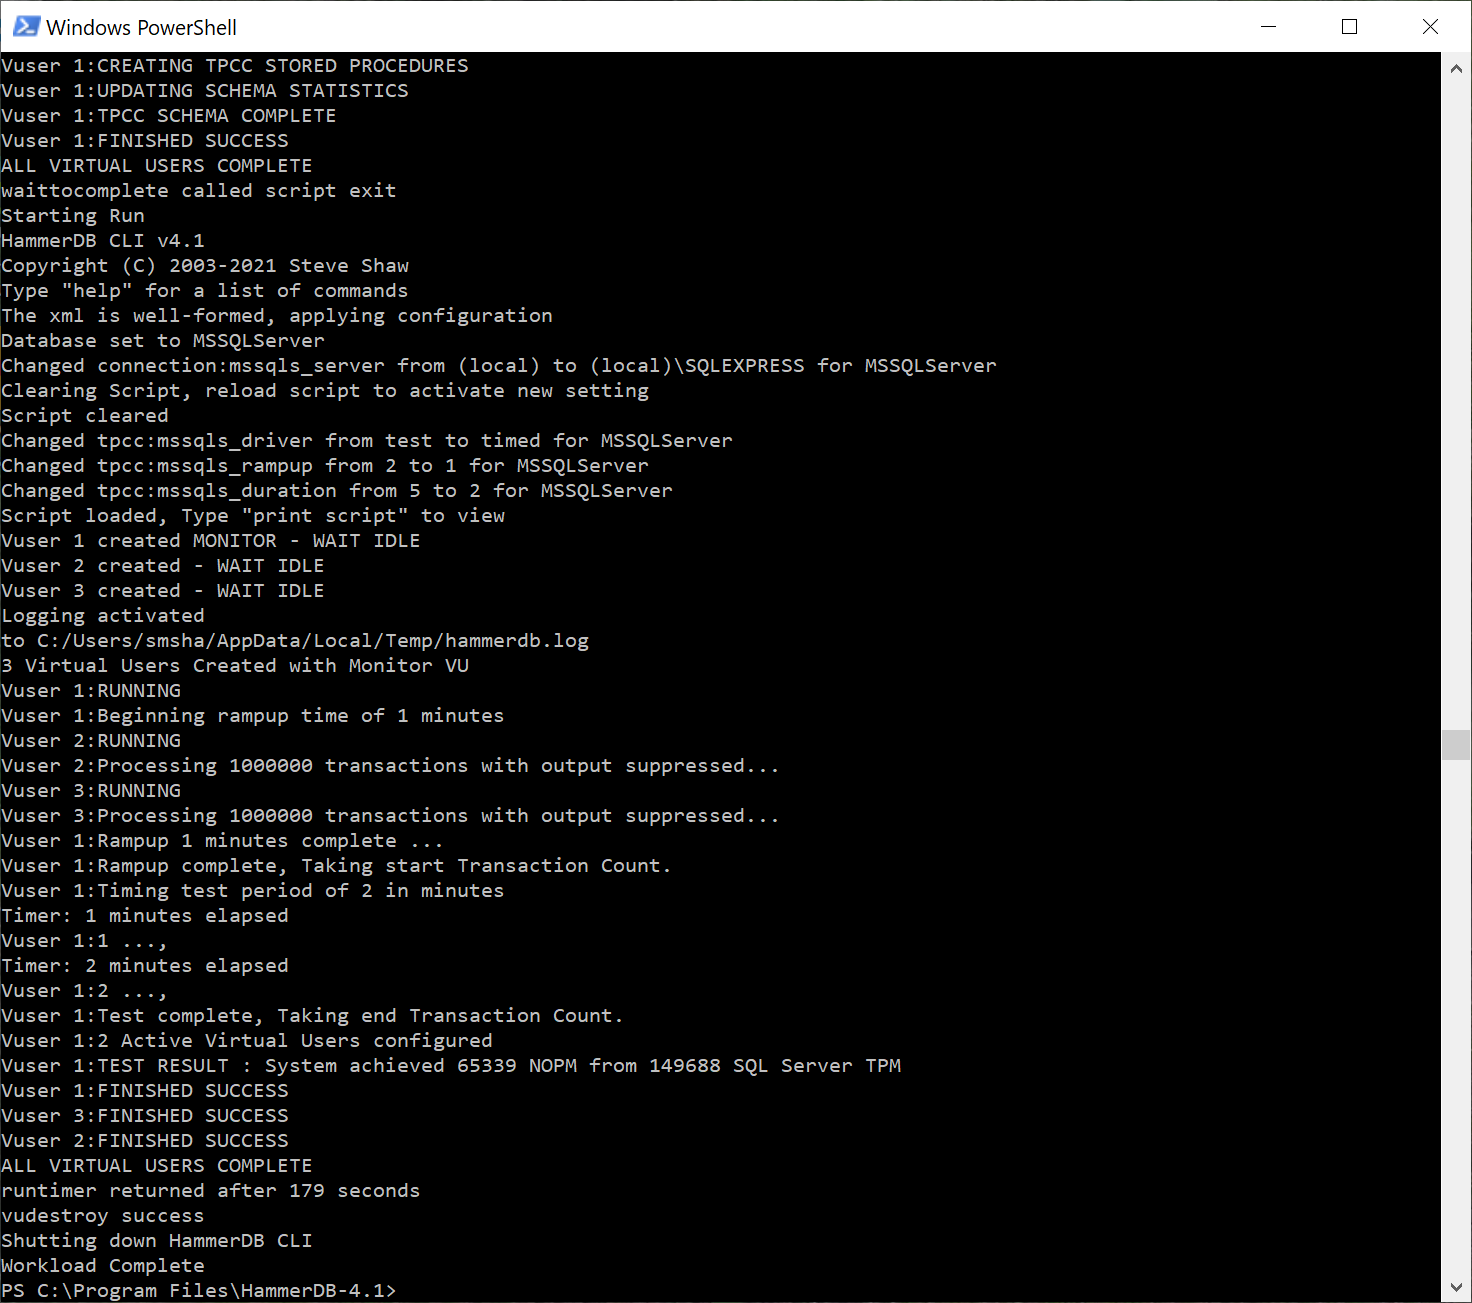
Once the build is complete the build script exits, the powershell takes over and follows it by running the driver script.
After the test is complete the powershell exits and returns to the command prompt.
Summary
Once you have an overview of the HammerDB workflow by following the GUI menu driven system using the CLI should be straightforward using the same approach. The key concept is to understand that both the GUI and the CLI are multithreaded and the Virtual Users themselves run entirely independently as operating system threads and therefore you interact with the Virtual Users by interacting with the main interface thread and passing messages to the VUs. This means if you exit too early from the main interface in either GUI or CLI the entire workload will be stopped.
Once you have familiarity with how the CLI works it is then not difficult to adapt this understanding to build complex automated workflows using TCL scripting, shell scripting or a combination of both.


